Gardening (outdoors),  Meal Planning and Recipes,  Trad Wife Life

Learn To Easily Grow Your Own Sprouts At Home

Learn To Easily Grow Your Own Sprouts At Home

Learn To Easily Grow Your Own Sprouts At Home
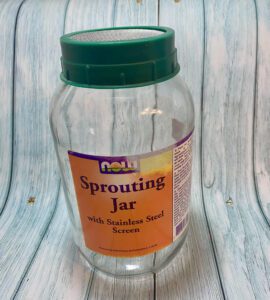
Eeps, you guys!! I’m so excited to share my latest find from GoodWill with y’all! I had no idea these even existed, I used to love buying little packages of alfalfa sprouts and putting them on my sandwiches, however, it’s increasingly much harder to find them because stores won’t carry them due to liability. During the commercial growing process, it’s easy for them to become contaminated with E. Coli, bacteria and salmonella. It’s very safe to grow them at home and still be able to enjoy them sooo you can imagine my excitement at this little victory at “The Bins”, and I paid only $1.99 for this half gallon sized sprout jar!
Being the helpful girl I am, I got to thinking I’d write a blog post about how YOU too can easily grow sprouts at home and add them to your sammies (or salads or meals)
In today’s fast-paced world, maintaining a healthy lifestyle is more important than ever. As a stay at home mama, you understand the significance of taking care of your family’s well-being. Homegrown sprouts are a convenient and nutritious addition to your meals, providing a burst of flavor and an abundance of health benefits. In this blog post, we will dive into the awesome world of sprouting, discussing everything from the equipment needed to safety concerns and where to source seeds. Let’s Gooo….
Equipment Needed:
To begin your sprouting journey, you’ll need some essential equipment. One popular choice for sprouting is the NOW brand sprouting jar. Note: the one pictured here that I bought at Good Will is a vintage (although new, never used jar) so if you’re looking in a health food store for this popular brand’s sprout jar, realize that it’s appearance has changed and now looks like this…
Learn To Easily Grow Your Own Sprouts At Home
Its innovative design allows for easy rinsing and drainage, ensuring optimal conditions for sprout growth. In addition to a sprouting jar, you may also consider using sprouting trays, salad sprouters, or even simple mason jars with mesh tops. These tools make the sprouting process a breeze, no matter how experienced you are. Check out NOW sprouting jars on eBay (I even saw a few vintage style like the one I found at Good Will). It’s a half gallon size and larger than the newer ones I found on eBay)
Some growers opt for trays but, in my opinion a jar is one piece, can’t spill and is self-contained. In addition to a jar, you might also want to get a stand which allows you to place the jar easily on an angle as needed for growing, and also, if you prefer to keep it on the counter or table, a darkening sleeve will be needed.
Instructions On How to Grow Your Own Sprouts:

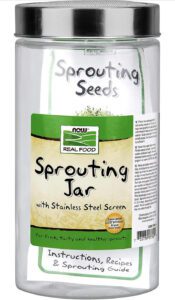
Growing sprouts at home is a straightforward and rewarding experience. Start by selecting high-quality organic seeds specific to the sprouts you desire. (Check out Etsy, which might seem like a surprising place to shop for seeds but you can often find a really wide variety of seeds and plants at a good price, and support another small business in the process.)  Popular choices include alfalfa, arugula, sugar snap peas, broccoli, and radish sprouts.

  1. Place 2 TBSP of seeds or 1/2 C of legumes/grains in a sprouting jar with 3 times as much water as seeds. Rinse the seeds thoroughly and soak over night. (If your seeds come in a package, consult the instructions on the package for growing instructions specifically for that variety of seeds/legumes)
  2. The next day, drain the water and transfer the seeds to your sprouting jar or tray.
  3. 5 hours of soaking is sufficient for many small seeds
  4. Using lukewarm water, rinse seeds and then drain again.
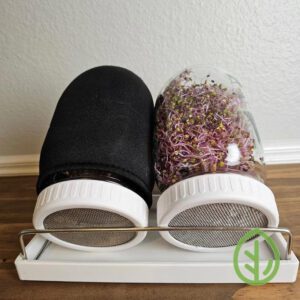
  5. Lay jar on an angle (or use a jar stand as shown here)
  6. in a warm, 70 degree (F) dark place (0r you can use a darkening sleeve for your jar – as shown below on left) for 1-3 days depending on variety of seeds used. Take the darkening sleeve off .

6. Rinse and drain the sprouts twice a day, making sure they’re always moist but not waterlogged (in hot and dry weather conditions you may need to rinse the sprouts 3 times a day- in very humid weather, the seeds should be kept in a dry place)

7. Turn jar over gently, over turning the jar rapidly will cause shifting in the sprouting seeds-this can break the tender shoots and kill the sprout. Breakage will cause sprouts to spoil.

8. Depending on the seed used, after 3-5 days, your sprouts will be ready to harvest – crispy, fresh, and bursting with life.

About The Darkening Sleeve:

(remember, if you don’t want the added expense of buying a darkening sleeve, you can place the jar in a cabinet or other dark, temperate location)

When sprouting seeds using a jar, it is generally recommended to keep the jar in a dark or low-light environment for the initial stage of sprouting. This darkness encourages the seeds to germinate and prevents them from developing chlorophyll, which can affect the taste and texture of sprouts.
The length of time you should keep the jar in the dark depends on the type of seeds you are sprouting. In general, most seeds require 1-3 days of darkness before they can be exposed to light. However, some seeds may have specific requirements, so it’s always best to follow the instructions provided with your seed packet or consult a reliable source.
As for darkening sleeves for sprouting jars, these sleeves are often used to cover the jar during the initial stage of sprouting to provide darkness. Once the sprouts start to emerge and reach a certain height, typically around 0.5-1 inch, the sleeve can be removed to expose the sprouts to light. This stimulates photosynthesis, allowing the sprouts to develop their green color and further growth. Again, it’s important to refer to the specific instructions for the particular type of seeds you are sprouting to ensure optimal results.
Where to Buy Seeds:
Finding quality sprouting seeds is essential for a successful endeavor. Many health stores and online retailers offer a wide variety of organic sprouting seeds. Whether you prefer local shops or the convenience of online shopping, you can easily find reputable sources for your sprouting needs. Additionally, consider supporting small businesses or seed-saving communities dedicated to preserving heirloom varieties.
The Nutritional Benefits of Adding Sprouts to Salads, Sandwiches, and Meals:
Sprouts are not only delicious but also pack a powerful nutritional punch. These tiny wonders contain high levels of vitamins, minerals, and enzymes, making them a valuable addition to salads, sandwiches, and various other dishes. Sprouts are an excellent source of fiber, aiding digestion and promoting gut health. They are also rich in antioxidants, which help combat oxidative stress and support a strong immune system. Incorporating sprouts into your meals is an easy way to elevate their nutritional value and add a satisfying crunch.
Safety Concerns and How to Avoid Them:
While sprouts offer numerous health benefits, it’s important to be aware of potential safety concerns. Due to their optimal growing conditions, sprouts can sometimes harbor bacteria such as E. coli or Salmonella. To minimize any risks, ensure you purchase high-quality seeds from reliable sources. Thoroughly wash your sprouting equipment before and after each use, and maintain strict hygiene practices during the sprouting process. Always handle sprouts with clean hands, and if you have any doubts about their freshness or safety, it’s best to discard them.
Visit pinkpeonyhouse.com/blog for More Homemaking Content:
At Pink Peony House, we’re dedicated to empowering women through tradition, love, and nurturing. Our blog offers a wealth of insightful articles, tips, and inspiration for stay at home moms like yourself. From homemaking advice to self-care rituals, we celebrate the beauty of traditional roles while embracing the modern world.
Thank you for stopping by the blog, we’ve got lots more to offer in addition to our blog content– check out the shop here.

🎯Please join my  Facebook group and join the community! It’s such a fun group, and you’ll be one of the first to learn of behind the scenes news! Join Here . If you’re active on Instagram, I invite you to follow me there as well! Follow the Pink Peony House Instagram.

🎯Be a Pink Peony House V.I.P. and get invited to secret sales, receive emails with subscribe only coupon codes and content, subscribe here (we’ll NEVER share your email with ANYONE, pinky swear!)


Leave a Reply